An adjustable box joint jig for use on a table saw with a single blade. Just the thing for quickly knocking up small boxes. The joints are strong, easy to assemble, and look awesome if you ask me. (Update: “Version 2” here)
This is my own design as I thought I could improve on examples I’d seen online. There are some fabulous but complicated designs out there, using lead screws or gears, that let you set very fine adjustments to get the perfect fit of the “fingers”. The trouble is they are pretty tricky to build by the looks for them, and usually are quite bulky. (A favourite is from www.woodgears.ca). I look at designs like that and am awestruck, but at the same time it makes me think there might be a simpler solution out there that would still meet my needs.
On the simple side of things, I like the designs that are not much more the a board with a key glued to one spot. They work by a cut, then shift that slot over tge key, to index the next cut. The key is fixed and not adjustable, and you also need a dado stack blade set (not something I have). Having to swap and adjust blades adds a lot of fluff each time you want to cut box joints, which sort of negates the simplicity of the design to an extent.
So I figured why not just use one side of the slots to index the position, and have a different and adjustable stop to fix the width? Then you can make multiple passes with a thin blade and get any width slot you you like! The basic concept was to use something very similar to those simple key based designs, although with a very narrow key. Then have that sit inside another jig that would have adjustable stops either side. Making it all pretty easy to make.
The build was pretty simple really. 10mm ply cut to various sizes for most parts. Then some 19mm thick wood for the 3 “rails”. The thicknesses aren’t critical so I just used materials I had lying around.
Roughly laying out all the pieces and you start to get the flavour of what this will look like. The inner jig snuggly fits into the outer jig fore and aft, with adjustable stops left and right to limit it’s lateral movement. A few angles and supports to keep things from moving over time. The size feels pretty good and should be fine to operate safely. I made this about 450mm wide by just 150mm long (I have a small tablesaw and little room to store things). The stops allow for 3 to 15mm wide cuts. The “inner” jig is sized to allow for a stack of 4 boards 20mm thick, with a little extra room, and up to 180mm wide. That suites my planned usage, but there’s no reason I couldn’t make it a bit larger under the same principle.
Before going any further I cut a chamfer onto a few of the pieces. The idea is that if you get saw dust in the corners, things stop sitting flush and square. So you effectively remove the corners, allowing you to be less precious about cleaning between cuts.
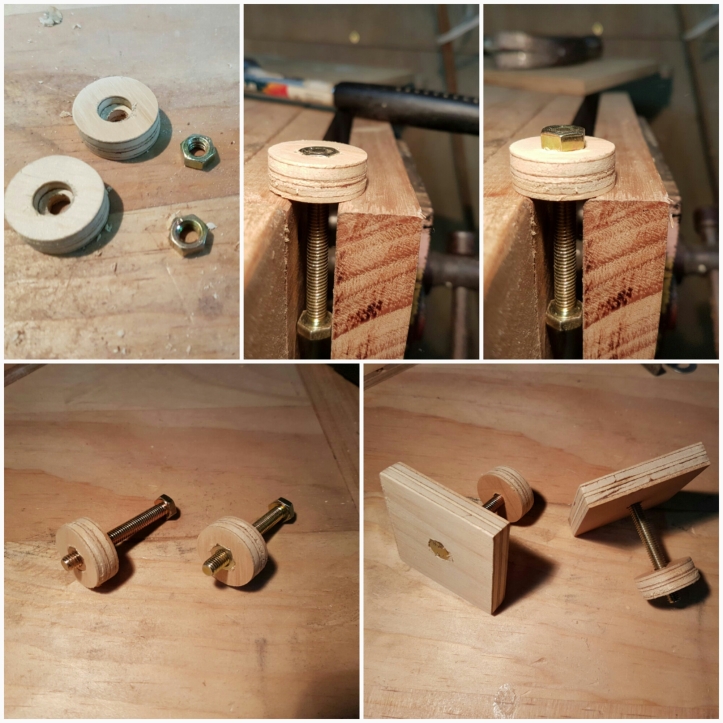
Next I drilled and then opened up slots on the rear rail where the adjustable stops get mounted. My adjustable stops were just some M6 bolts and screws, embedded into some ply wood. I started with counter-boring holes to the diameter of the hex flats width, then simply hammered them into place, making a simple but effective connection.
Nothing fancy about the assembly. Glued together, and when dry re-enforced with some nails in pre-drilled holes. With pretty well cut pieces, keeping things square wasn’t much of a trouble.
The runners I made out of some left over chopping board I happened to have from a kitchen project. A bit of an experiment really as I don’t know how well it will wear, but I think this is nylon which works reasonably well as a light duty bearing surface. Plus I figured it wouldn’t swell like timber with humidity changes, which might otherwise cause it to bind up when humid. (My first ever table saw jig used timber runners, which worked for a while, but I did find the runners swelled up over winter, and I had to scrape them back.)
I probably should have put the runners on earlier really, then attached the rear rail. But in the end I don’t think going for this order of assembly was too much of a problem. I figured why not just put the runners into position on the table, and glue the base onto them, keeping it all aligned with a square. I just needed to prop up the runners slightly so they stuck out of the table a little, then weighted the jig on top. Simple. I did come back re-enforce the joint with a couple of screws, just to be on the safe side as I don’t know how well the glue I chose would bond to nylon.
OK so small admission. I may have glued the jig to my tablesaw 🙂 . I had meant to put down some masking tape to prevent exactly this but I completely forgot! Managed to get it off without damaging jig or table fortunately. But the jig did need some scrapping to get it to run smoothly.
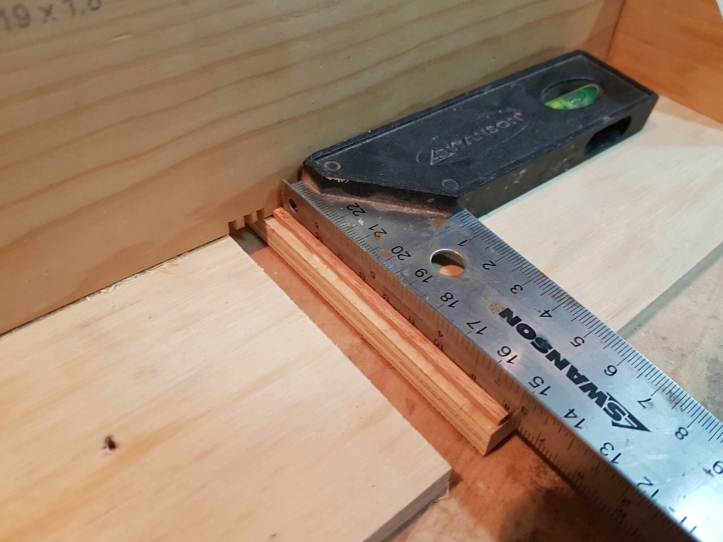
On the home strech now. I still needed to cut a tiny key. 3mm square tiny! This needed a low profile spacer on the fence, and a temporary zero clearance panel over the blade so it wouldn’t get pulled into the saw. Surprisingly this worked really well.
Glued on and it’s ready to try out. This 3mm key is glued 3mm from the edge, to allow for the smallest fingers; about the width of my saw blade. The gap you can see I cut in with the table saw, and this represents the limits of those adjustable stops. So if I have the maths right, I should be able be adjust the width and spacing of each cut.
Here’s the finished product. I’ll go through my first trial with it in my next post.


